Steam bent timbers.

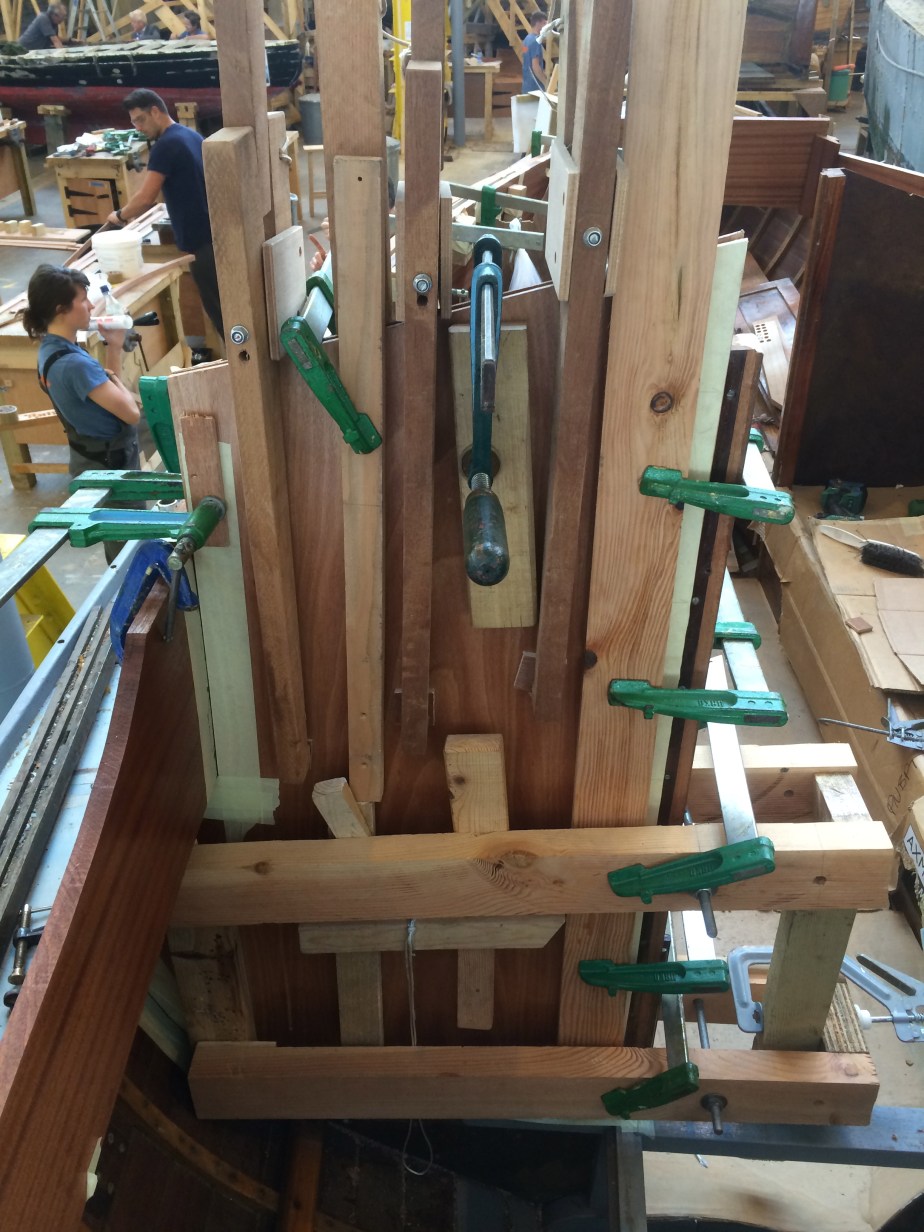
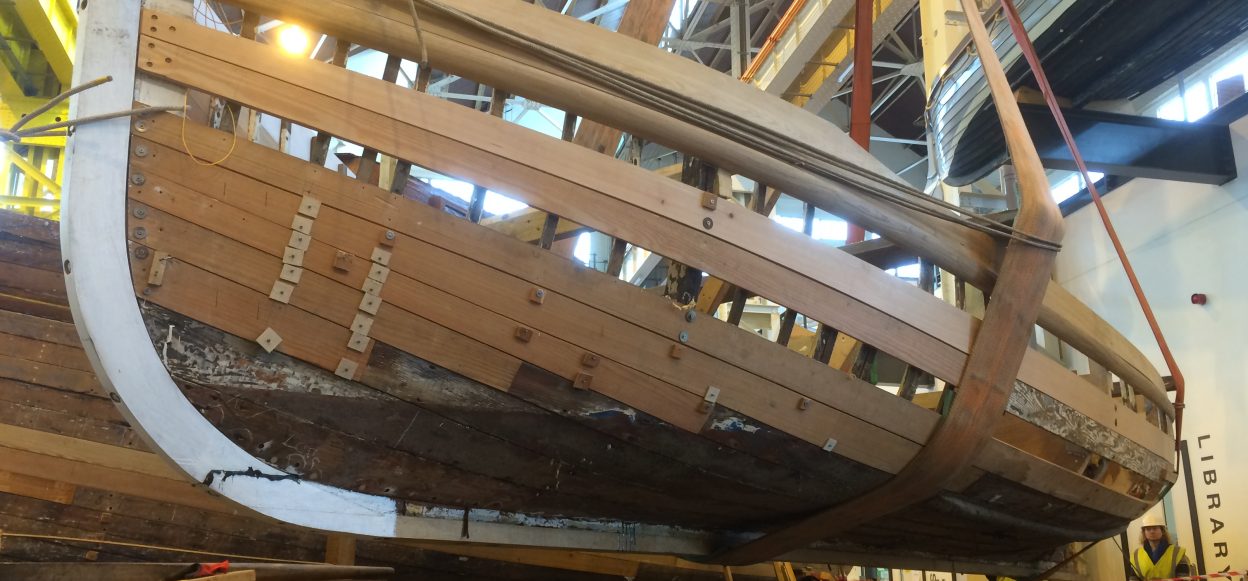
My first experience of the power of steam bending came with the opportunity to take part in installation of timbers into our dartmouth gig. She was still in strongback, but we had removed the moulds and marked out the positions of the timbers. The oak timbers were selected for straightness of grain, prepared and soaked for several days. Timbering was a team effort and several teams of students were to be involved. Luckily I managed to wangle my way into a place on many of these teams.

I am fascinated by just how much bend is possible, that the lignins are loosened by heat and the timber should be compressed, not stretched as much as possible.

Katie and the clamps.

Katie is a carvel built folkboat, and is undergoing a complete cabin and deck refit. She was the first vessel I worked on after graduating joinery. I had the pleasure of working alongside a very talented colleague, Becci Haigh. Unfortunately I was so into the work that I went through a phase of failing to take a proper photographic record.

We laminated new marine ply onto the original bulkheads, using spiling techniques to obtain the correct shapes and west system epoxy to bond into place.

We installed new beam shelves onto the cabin sides, and cut the rolling bevel that is required for the curved coachroof to fit. We made corner posts and door surrounds, and made up patterns and laminated beams for the coachroof. All in sapele. As mentioned in the previous post I then began fitting the deckbeams.

As you can see in the pictures, you can never have too many clamps..

IMG_1795


Splicing.


I am no rigger. I can tie a bowline, square knot, a rolling hitch, and a towmans hitch and that’s all I really need. But there is an amazing guy at school who is known as ‘Mr Knotty’. He is a rigger who has served nearly thirty years on the yard and he is a proper lovely old rogue. Here are a couple of pics of the handles he helped me splice for my shipwrights box, which I STILL haven’t got around to fitting. Oh, and the macrame keyfob for the same box. Watch this space.

Deck beam exercise.

The final compulsory part of joinery. Incorporating the use of homelets and half dovetails, this is an incredibly useful exercise. Soon after hitting the shop floor I was to use what I’d learned. The vessel pictured here is ‘Katie’, a carvel built folkboat which is having a full deck and cabin refit. A colleague and I fitted the beam shelves and began fitting deck beams, these were made more interesting, but ultimately simpler because we had to consider tumblehome as opposed to flare. The pictures are of my first beam, I eventually fitted three of twelve before my tutors dragged me off protesting, I would have cheerfully done the lot.

The spirit level.

I never thought I’d be required to make my own spirit level but this course is full of surprises. Made of sapele and surprisingly accurate, I used it in setting up the final assembly of the stepladders and have used it since many times on boats, usually for setting out deck beams.

The Stepladders.

When I was doing Joinery these were considered optional. I was keen to make them as they are a good introduction to marine joinery and working subtly ‘out of square’, the steps taper as they rise.

The first part was the top step which is devised as a miniature deck grating, the rest of the steps follow. Sapele throughout.

The bollow plane and first oar.

In order to make my first spoon oar, I first needed to make a bollow plane. These tools are made from beech with a plane iron being ground to a curve. I also made a spar gauge from sapele, a simple device that helps mark the oar loom, the stick bit, from square section to octagonal at the beginning of the rounding process.

The first oar I made is known as a spoon oar, and was made from douglas fir, selected for it’s lightness and strength. I really enjoyed the ‘feel’ of this exercise, the use of touch being equal or more to the use of sight. Consideration of symmetry was of course paramount.

In a future post you will see that I have since made another oar for a specific vessel, one which is larger and has a hollowed loom.

The shipwrights toolbox.

This project was a major component of my joinery foundation. Now it’s full of all my favourite handtools and is a much treasured thing indeed. It may not be so practical in the real world as it is made of solid oak and thus rather um, static. The trays and smaller box are of spruce. Cutting fine dovetails in this fragile material was a very satisfying education. I learned a huge amount regarding accuracy and patience in putting this baby together..

Joinery.

I completed the joinery foundation in twelve weeks and a day. And I loved every minute of it. No power tools were allowed with the exception of a bench grinder for sharpening and a pillar drill. Pictured here, my oilstone box, made from a single piece of american walnut, with beech stone wedges. The rebates were ploughed out with the use of a hand router. Also pictured, early dovetail practise and basic scarf joint exercises. These jobs were undertaken in the first three weeks.

More pictures in the next post..

An online portfolio, introduction.

I am currently a student at IBTC Portsmouth, studying traditional wooden boatbuilding. It is an incredible place to study. The course has stretched me in ways I thought impossible and introduced me to some amazing techniques. This blog is an attempt to produce an easily accessible portfolio of my work, of which I am very proud.

I also have some history with steel boatbuilding, I live on board an old harbour tug which I rebuilt, with a lot of help! The skills I learned enabled me to gain employment as a steel fabricator and welder and I spent some time plating various river vessels. I will endeavour to include pictures of this work here too.

I often say ‘if I can’t saw it in half, sharpen it, or oil it- I’m in big trouble’. This is a long and lighthearted way of saying that I’m not particularly computer savvy, so please bear with me and I will try to keep this portfolio well updated.